Here are some tips on making the best brew at home!
Below we outline the steps to making a fantastic filter coffee at home, which you can make to a very high standard with relatively inexpensive equipment. Other drinks like flat whites or lattes are far more difficult to make at home without a very expensive coffee machine.
What you’ll need
You’re definitely going to need beans, we sell our signature blend on our website, you can even get a subscription so you never have to worry about running out (it’s a bit cheaper as well). Buying whole bean coffee and grinding the amount you need when you need it will give the best results and help keep the coffee fresher for longer. Don’t worry if you haven’t got a coffee grinder though, buying pre-ground coffee will work just fine and will keep fresh for about a month once opened.
You’ll need a filter funnel and filter papers. We recommend Hario V60 and Hario papers. That’s really all you need but a gooseneck kettle is very helpful and recommended (and they look fantastic).
https://northerncobbler.com/collections/coffeeware/products/stagg-pour-over-kettle-fellow-products
We also sell a few varieties of pour over sets such as the Stagg kit, which is just as easy to use, it just looks a little different.
If you’re not using a pour over kettle like the one linked above you’ll need a little measuring jug similar to that used for baking.
Grinding the coffee
You’ll need the coffee ground quite course, you don’t want a powder!

If it’s too fine the water will never be able to pass through and you’ll end up with a sort of coffee mud, too course and the water will pass through too fast and you’ll get a weak coffee. A good coffee is up to the individual so there’s plenty of room to experiment and play around here!
We use about 15g of coffee for a small cup. Our small cups are 8oz so if you use 2g of coffee per ounce you should be fine. If you’re grinding your own coffee add a few extra beans because some grounds will get stuck in the machine and you don’t want to be under weight. You don’t need to be expertly precise working roughly to these guidelines will be fine.
Get the kettle on
Fill the kettle and boil the water, it’s best to let the water cool a little bit before pouring so you don’t burn the coffee which is why I like to get the kettle started at this point – so you’re not waiting around.
Pop your filter funnel of choice over your cup, mug, carafe or serving jug and put a filter paper in. If the filter paper won’t stay in place you can run some water through it, and over the edges it helps it stick to the sides.
Put your ground coffee in and give it a tap to level it out. Pour your water from the kettle in to your gooseneck dripper or your measuring jug.
Get brewing
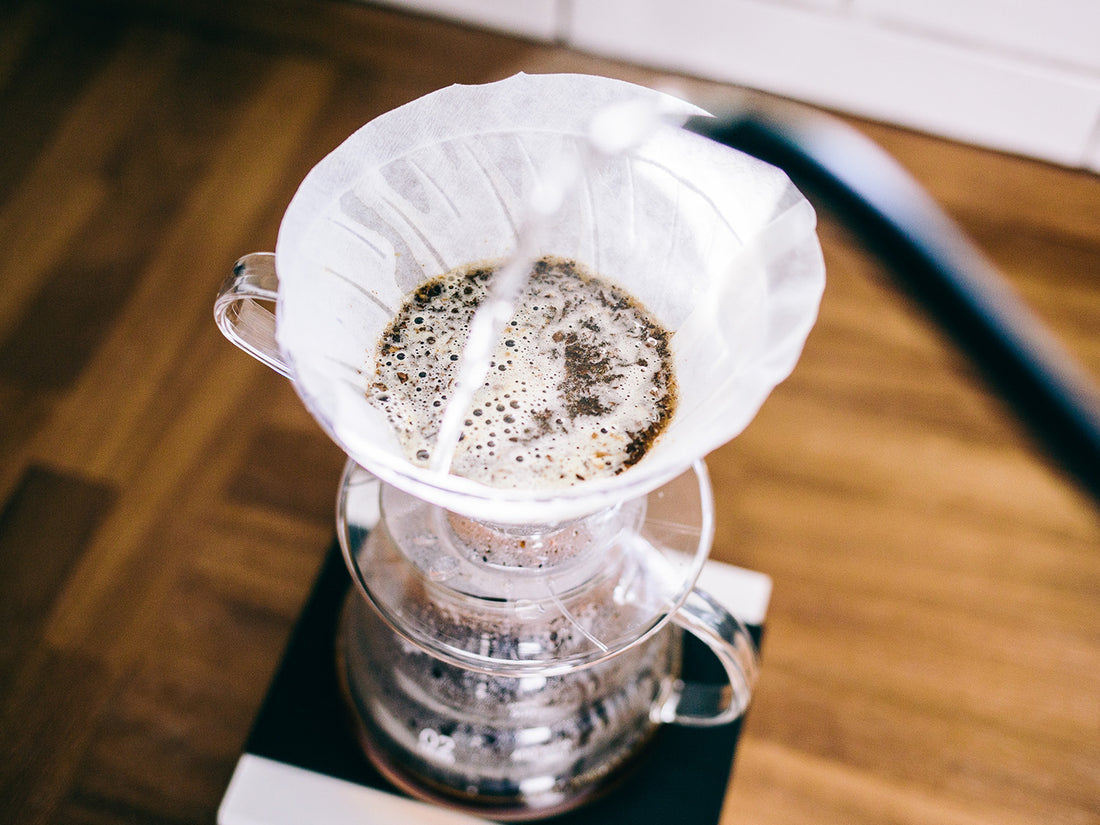
Slowly pour the water over the coffee, you want to pour it consistently and try not to let it splash. Working your way from the outside in making concentric circles is a good way to get even coverage. Once you’ve got the coffee nice and wet you’ll start to see some bubbling, this is called the bloom and is just the coffee releasing its natural CO2, give it 20-30 seconds and then repeat the pouring process.

Let the water drip through the coffee but don’t let the coffee dry out. Once the water level gets low enough you can see grounds showing again, it’s time to add more water. Keep going until you’ve got as much coffee as you want!
The key to getting the best brew possible is for the water not to filter through too fast or too slow. It’s hard to judge and everybody has different ideas and it can vary from blend to blend as well. A slower pour will bring out the bitterness more and a faster pour will emphasise the lighter notes but also make it a bit weaker. When we make a carafe of coffee (400ml) we usually aim for the whole pouring process to take about 3 and a half minutes.
Once you’re done serve up and enjoy! The coffee purists will say that a filter coffee should never have milk added but you’ve made it yourself and you get to enjoy it however you want!
If you love your filter coffee but this seems like a bit too much effort then there are other options available. Our favourite is the Wilfa Classic which we sell on our website. It makes coffee in exactly the same way but the pouring stage is fully automated!
Hopefully this gives you everything you need to start making your own filter coffee at home. If you’ve got any questions about filter coffee, anything we’ve mentioned in this article or any of the products on our website, please do get in touch or ask in store. Our baristas are all coffee enthusiasts and love a good excuse to chat about coffee!